How to Do Drywall Repair and Paint
Drywall repair can be intimidating, but with the right tools and approach, it’s easy enough for most homeowners. The key is to assess the damage, gather the required materials, prepare the surface, apply the patching compound, sand and smooth, and paint the area so it blends with the rest of the wall.
Small holes can be covered with a dab of spackle or patching compound and then touched up with paint to blend in. Larger holes need a full patch and possibly a repaint to make sure the repairs look as good as the rest of the wall. Visit https://www.professionalhomerepairservice.com/ to learn more.
Drywall is not waterproof, so any cracks in the surface should be treated as a serious problem and repaired as soon as possible to prevent mold, mildew, or fungi from developing. Mold is not only unsightly and unhealthy, but it can also cause structural damage that threatens the integrity of your home.
Moisture damage is another sign that drywall needs repair, especially in damp areas of the home, or in rooms that receive direct sunlight. This type of damage often shows up as a soft spot or a line in the drywall, and can lead to a variety of problems, including mold, rot, or wood damage. If left untreated, moisture damage can even lead to a collapsed ceiling or crumbling walls.
Nail pops are a common problem in homes, caused by nails pulling loose from the wood studs and protruding through the drywall tape or paint. Although not a danger to your home, nail pops are unsightly and should be repaired. The easiest solution is to cut a new patch piece of drywall and secure it with wood backing strips and drywall screws. Make sure there is no wiring or plumbing behind the drywall before cutting by looking through it with a flashlight.
Cut a square piece of drywall that is slightly bigger than the hole. Set it in place over the hole and trace around it with a pencil. Use a drywall saw to cut along the trace lines.
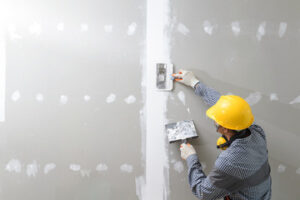
Frame the hole with furring strips (pieces of lumber attached to the back of the drywall) that are long enough to extend past the edges of the patch. Screw the strips to the drywall, then use them to support the patch and cover the seams with a strip of mesh joint tape. Add a layer of joint compound to the entire patch and tape, using a putty knife to smooth it and feather the edges so it looks more like the rest of the wall.
Installing a Patch Kit
For DIYers, it’s important to know that a wall repair patch kit can be a great resource for repairing cracks and holes in walls. However, there are a variety of products on the market and it’s crucial to choose the right one for your specific needs. Choosing the best product and following manufacturer instructions can help you avoid the frustration of failing to complete the project.
Drywall patch kits come with a variety of different tools that will allow you to complete the job efficiently and with minimal effort. They usually include a putty knife, which is used to apply spackle or joint compound to the wall. The putty knife also allows you to smooth the compound for a more seamless finish and provide additional support for the patch.
Depending on the kit you purchase, you may also receive sandpaper to help you sand down the surface after the patch has been applied. This is an important step because it helps to create a surface that’s ready for painting, and it also helps ensure the paint will adhere properly when you’re done.
Some drywall patch kits are designed specifically for nail holes and other small holes. These patches have a self-adhesive backing that makes it easy to apply and remove, and they’re available in a variety of sizes to fit most holes. Other patch kits are made to address larger holes and can be used for a wide range of repairs.
These larger patches are backed with fiberglass mesh tape, which helps to strengthen the area and prevent future cracks. These patches are also more durable than other types of drywall patch and can be used for longer periods of time. They’re also easier to install and are more versatile than traditional drywall patch.
If you’re a renter, it may be hard to ask your landlord to replace the hole in your wall, so patching it and painting over it is a good alternative. It’s a quick and easy way to fix the hole so that it’s almost impossible to tell, and it will save you money in the long run.
Installing a New Piece of Drywall
Anytime something physically damages a wall or ceiling in your home, it needs to be repaired. For small damage like nail holes from moving pictures or tiny nicks, you can often fill the hole with spackle and touch-up paint to make it look new again. But for larger damage, you may need to install a new piece of drywall in the area and cover it with a fresh coat of paint.
Some of the signs it’s time for drywall repair include dents in your walls from furniture or appliances, water damage, stains around windows or from leaks in the roof or plumbing, and even mold and mildew. Fortunately, repairing drywall is relatively easy and affordable.
You can do basic drywall repairs yourself, but it’s best to hire professionals for extensive damage or a more complicated project. Professionals can save you time and effort, and also ensure a quality job that’s long-lasting.
To perform a simple repair, first clean the area and remove any loose pieces of drywall with a utility knife. Then, apply joint compound to the damaged area using a putty knife and let dry before sanding and smoothing it. Use a second coat of joint compound if necessary to achieve a smooth, flawless surface.
When repairing a corner, you need to be careful not to lever against unsupported drywall as this could punch a hole that will require a more extensive repair. If you notice a dent in the corner, cut vertically along the edge of the damaged area to expose the metal corner bead. Then, use a metal-cutting hacksaw to cut through the bead above and below the damaged section.
If the corner bead is still in good shape, install it to prevent further damage to the wall. If the bead is completely ruined, replace it with a new piece of drywall. Use a framing square to draw the borders of the patch so you can buy a drywall patch that fits perfectly. Be sure to purchase drywall that’s the same thickness as the surrounding wall, and place several layers of cardboard or a sheet of plywood behind the patch to avoid additional damage from tool levering.
Painting
Now that you’ve repaired any cracks or holes in your drywall, it’s time to give them a fresh coat of paint. This final step is where the pros separate themselves from the do-it-yourselfers, as a quality paint job can make or break the appearance of your finished project. Having the right tools and skills is essential, and there are a few key steps in preparing for a paint job that will ensure the results look smooth and professional.
First, the surface of the drywall should be cleaned thoroughly to remove any dust or debris that may interfere with the adhesion of the repair materials and paint. This can be done with a damp cloth or sponge, or with a mild detergent mixed with water. Then, the area should be sanded to create a smooth surface, eliminating any rough spots or bumps that might show through once the new paint is applied. Professionals use fine-grit sandpaper to achieve the right level of smoothness.
After sanding, the surface should be primed to provide a uniform base for the paint. This helps prevent the patched areas from absorbing more paint than the surrounding wall, and it also seals the texture of the patched drywall so it blends with the rest of the wall. Professionals select the best primer based on the type of paint and condition of the wall.
Once the primer is dry, a final light sanding of the repaired area can be done to make sure it’s perfectly smooth. This is important because any blemishes or bumps will be obvious once the fresh coat of paint is applied. Professionals take extra care to ensure that all the textures on a room’s walls match, including any textural changes that happen over time.
For example, if an existing wall has a texture like orange peel, the drywall patch should be sanded to match this texture before painting. Alternatively, a spray or hopper gun can be used to apply a textured paint that matches the original texture on the wall. In either case, the painters will feather out the edges of the texture so it looks smooth and natural, then they will apply a coat of paint to the entire surface.